Tipard DVD Creator
This is a multi-functional and DIY DVD-creating application to help users put several video clips(including 3GP, ASF, AVI, DV, VOB, FLV, M2TS, MTS, SWF, MKV, MPEG, MPA, DAT, MP4, TS, MOV) together to make a general DVD folder or ISO file, also, you can directly burning DVD disc.In addition, this awesome DVD Creator allows users to freely add desired audio tracks and subtitles to the defined video clip, or edit the audio tracks and subtitles to get ideal playing effect; plus, users can freely choose diverse menu background, frame style, button type and DVD title content, font, color and size to get customized DVD menu.
In a word, this is an easy-to-use DVD Author, once owning it, users can freely make personalized DVD disc or DVD file to keep beautiful memories in a longer time and more steady situation. What are you waiting for? Just get the free trial version to make an intertesting DVD work with your mark.
- Create customized DVD folder or ISO files
- Burning DVD disc with fast writing speed
- DIY DVD menu options meet all your needs
- Give your ideal audio track and subtitles
- English/French/German/Japanese four interface languages
DVD Creator Guide
Step by Step Guide
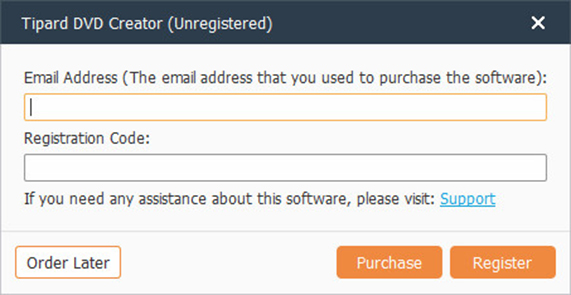
Step 1: Install and register Tipard DVD Creator
Download and double click Tipard DVD Creator installation file; then follow the instructions to finish the installation.After installation, please launch DVD Creator, then enter correct User Name and registration key in pop-up registration window, then click "Register" button to finish registration.
Step 2: Load video file
After registration, you will see the the following screenshot.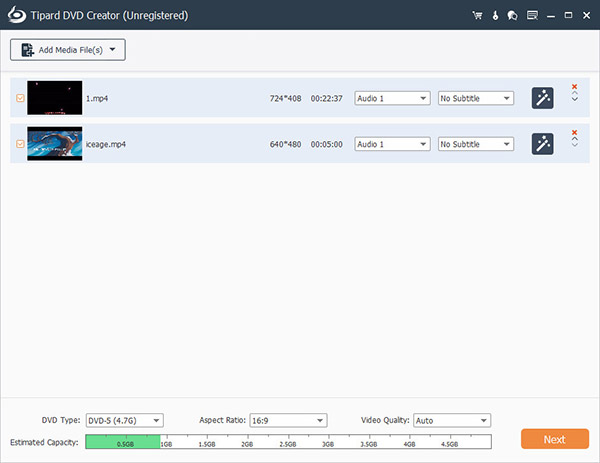 Load any single video or multiple video files you want to convert by
clicking "Add Video"/"Add Folder" option under the "File" pull-down
menu, or just click the "Video Plus" image button in the main interface.
Load any single video or multiple video files you want to convert by
clicking "Add Video"/"Add Folder" option under the "File" pull-down
menu, or just click the "Video Plus" image button in the main interface.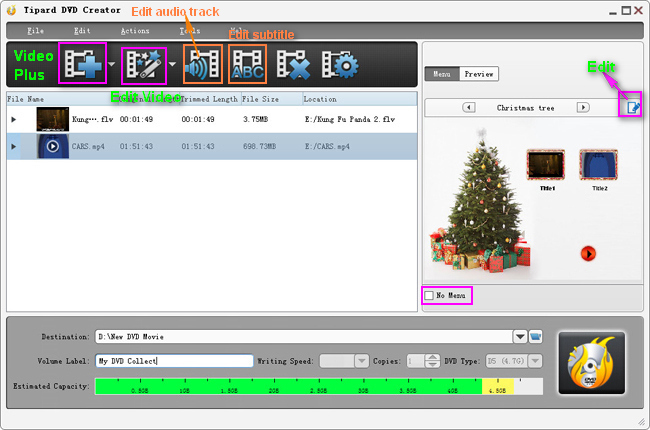
Step 3: Make DIY play menu as you like
Click "Edit" Image Button on the upper right corner of the main interface displayed above, then you can create DIY play menu on the popped-up "Edit Menu" Window. For detailed instructions, please click How to DIY Play Menu?Also, if you do not need Play Menu, you can just check "No Menu" Checkbox on the lower right corner ot the main interface.
Step 4: Edit single video file at random
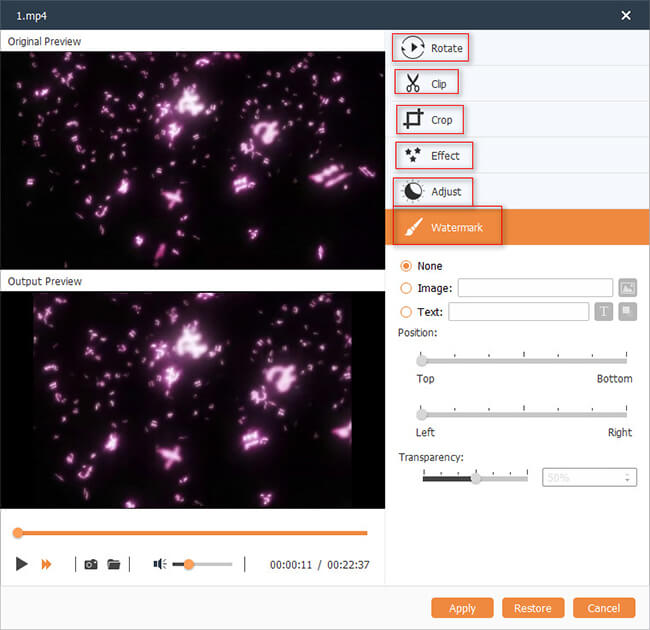
To freely adjust video effect, you can choose to open "Effect", "Trim", "Crop" or "Watermark" Edit Window by clicking "Edit Video" pull-down Image Button on the upper left corner of the main interface, or you can just clicking one of the four options under the "Actions" pull-down menu.You are allowed to freely drag the Brightness, Contrast, Saturation, Hue and Volume 5 Effect scroll bars to choose the perfect video effect you like best.
Also, you can freely trim or crop the single source video or add a text or image watermark to it.
Step 5: Edit and adjust audio tracks and subtitles
Click "Edit audio track" Image Button or "Edit subtitle" Image Button on the upper left corner of the main interface to open "Edit Audio/Subtitle" Window to edit or add any audio tracks or subtitles. For detailed instructions, please click How to Add or Edit Audio Tracks? or How to Add or Edit Subtitles?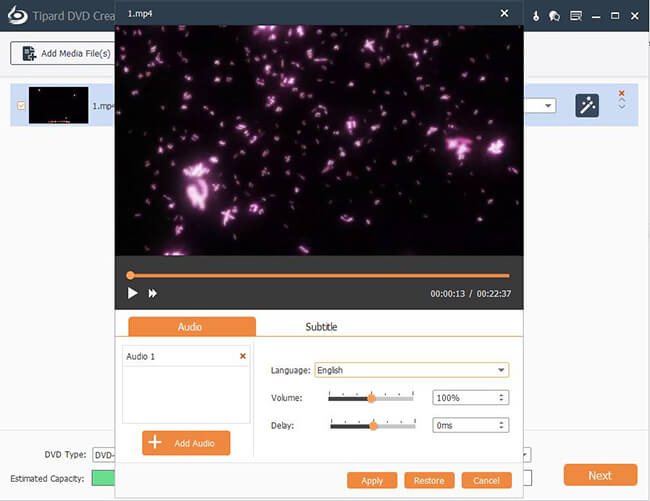
Step 6: Create DVD file
Output DVD Folder: You can choose "save as DVD Folder" Option from the Pull-down Menu of "Destination" Column, then create a new folder and name it. Then, you can input any content to be the DVD Volume Label. Then, you can click "Output DVD Folder" Image Button to create a DVD file. Output ISO file: Also, you can choose
"save as ISO" Option to output a ISO file. Then, you can click "Output
ISO file" Image Button to create a DVD file.
Output ISO file: Also, you can choose
"save as ISO" Option to output a ISO file. Then, you can click "Output
ISO file" Image Button to create a DVD file. Burning DVD: You can directly inser a
blank DVD disc to DVD-ROM, then name the Volume Label, set Writing Speed
and choose output copies and DVD Type. Then, you can click "Burning
DVD" Image Button to create a DVD file.
Burning DVD: You can directly inser a
blank DVD disc to DVD-ROM, then name the Volume Label, set Writing Speed
and choose output copies and DVD Type. Then, you can click "Burning
DVD" Image Button to create a DVD file.
How to DIY Play Menu with DVD Creator?
Step by Step Guide
Step 1: Choose Menu Template
Click "Menu" Option under the drop-down list under the upper left corner of the Edit Menu Window. There will be Scenery, City, Festival, Plant, Animal and Others 6 template themes, each of which has multiple corresponding templates to choose. You can just click any template you like to be your Play Menu.
Step 2: Choose Frame
Click "Frame" Option under the drop-down list under the upper left corner of the Edit Menu Window. There will be various frame styles to choose, so you can choose any one to be the Play Menu frame of each video file.
Step 3: Choose Button
Click "Button" Option under the drop-down list under the upper left corner of the Edit Menu Window. There will be various Button styles to choose, so you can choose any one to be the Play Menu Button.
Step 4: Edit Title
Click "Text" Option under the drop-down list under the upper left corner of the Edit Menu Window. There will be Title, Font, Color and Size 4 editing items, which allow you to freely input any video title; choose your desired Font style; favorited color and proper font size to get perfect effect.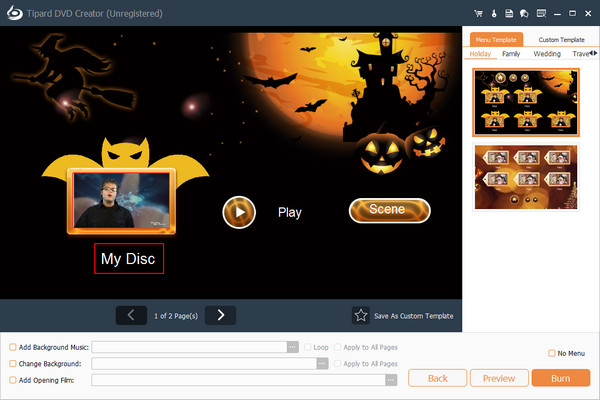
Step 5: Add more effects
Add Background Music: You can add a song or a piece of music to the menu by clicking the "Background Music" checkbox.Add Background Picture: You can add a picture to the menu to replace the chosen template image by clicking the "Background Picture" checkbox.
Add Opening Film: You can add a short-duration video file to the menu as a prologue of the output DVD file. Also, you can set the Loop Duration at random.
 Then, after the five steps operations above mentioned, you can get a personalized DVD Play Menu.
http://www.tipard.com/download/dvd-creator.exe
How to edit or add Audio Tracks with DVD Creator?
Step by Step Guide
Step 1: Edit current audio track
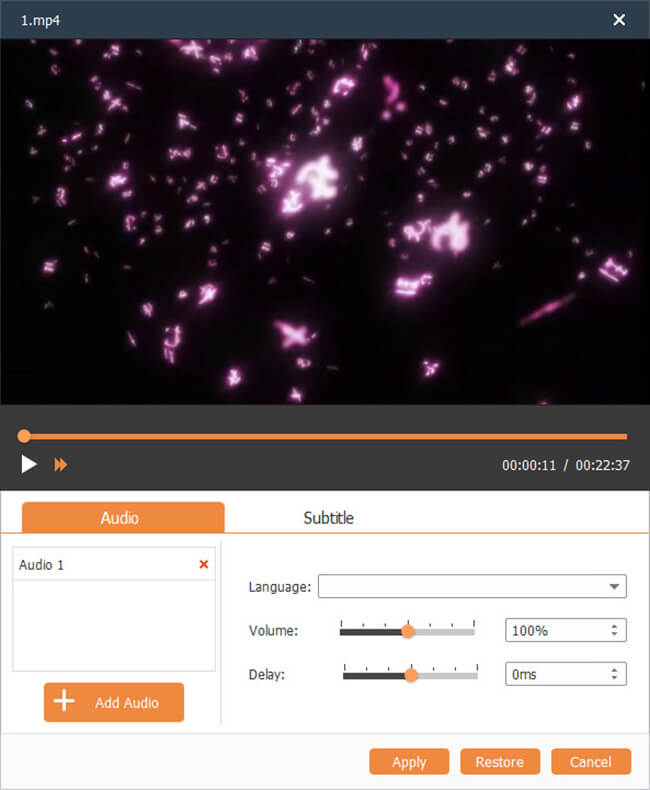 1. Set Language: To choose Language title
for the current audio track, you can choose from the drop-down list in
line with the "Language" column, and teh list has multiple language
types to choose, such as English, French, Japanese, German, etc.
1. Set Language: To choose Language title
for the current audio track, you can choose from the drop-down list in
line with the "Language" column, and teh list has multiple language
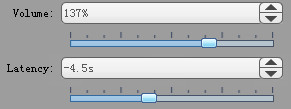
types to choose, such as English, French, Japanese, German, etc.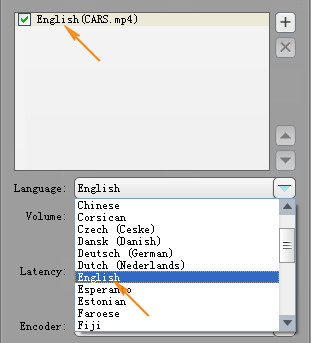 2. Adjust volume and set Latency:
To adjust the volume, you just need to click the up-down buttons in line with the "Volumn" column or drag the scroll bar under the "Volume" column to get your desired volume.
To set Latency, you can just click the up-down buttons in line with the "Latency" column or drag the scroll bar under the "Latency" column to choose proper latency duration to realize the synchronization of video and audio.
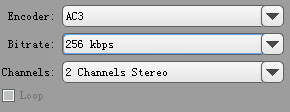
 3. Other Settings:
You are allowed to choose your desired Encoder, Bitrate and Channels to get perfect audio effect.
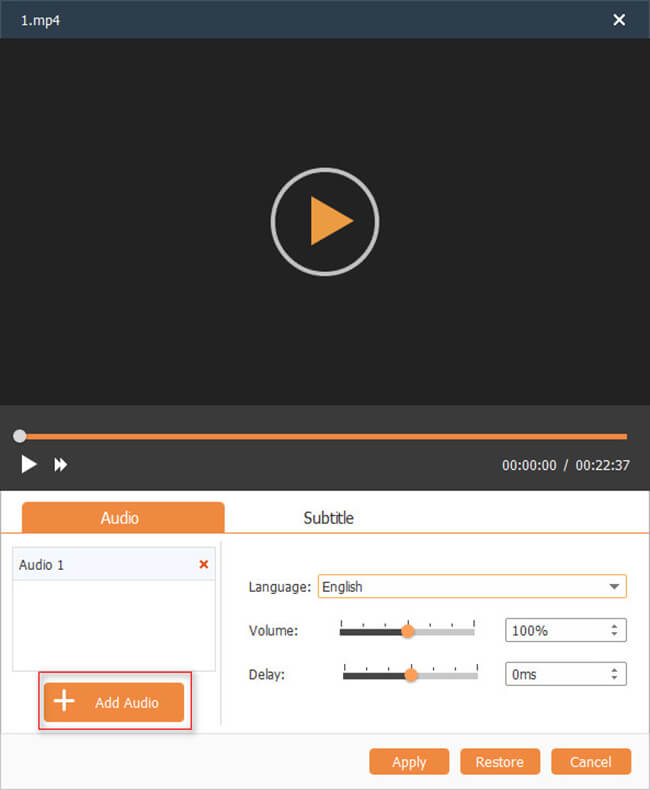
Step 2: Add audio tracks
You are allowed to import other audio tracks of other language types (such as French, Greek, German, etc.) by clicking the Plus "Image" button on the upper right corner of the interface below. Also, you can choose corresponding Language title for each audio track.Plus, to loop any audio track, just check the "Loop" checkbox.
How to edit or add Subtitles with DVD Creator?
Step by Step Guide
Step 1: Add proper subtitles
To add proper subtitle, you can just click the "Plus" image button on the upper right corner of the interface. It highly supports SRT, SUB, SSA and ASS four subtitle types.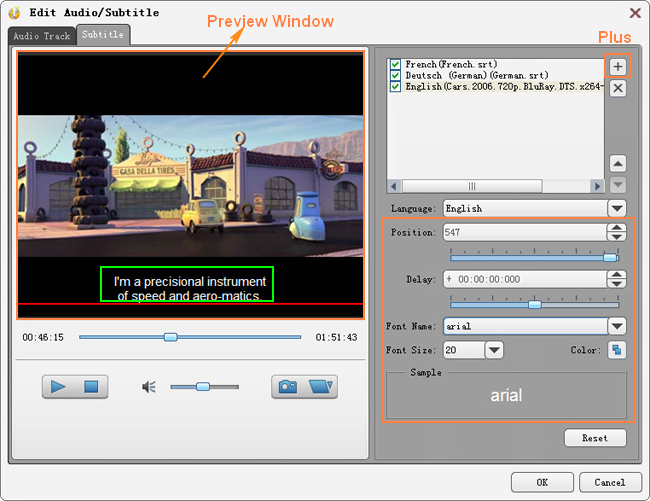
Step 2: Adjust each subtitle
1. Adjust position: To get ideal subtitle display position like the preview window on the image above shows, you can click up-down buttons in line with "Position" Column or drag the scroll bar under the "Position" Column.2. Set delay duration: Another, you can just click the up-down buttons in line with the "Delay" column or drag the scroll bar under the "Delay" column to choose proper delay duration to realize the synchronization of subtitle and audio.
3. Choose style: You are allowed to choose your desired Font Name option to get ideal Font style, set proper Font size and choose any color you like.
http://www.tipard.com/download/dvd-creator.exe
Tipard DVD Creator 5.2.68 [x86 x64] incl Patch Latest Software With Crack Free Download
ReplyDeleteClick To Download Software : Tipard DVD Creator 5.2.68 [x86 x64] incl Patch Latest Software With Crack Free Download
ReplyDeleteNICE BLOG VERY GOOD SOFTWARE...
Tipard DVD Creator Crack
ControlMyNikon Pro Crack
PGWare SuperRam Crack
WinZip Driver Updater Crack
SpyHunter Crack
Panda Antivirus Pro Crack
Advanced System Optimizer Crack
MAGIX VEGAS DVD Architect Crack